#Class Solo Scenarios (10 Classes)
Contents
1-player scenarios for experiencing each class's core mechanic. Start at 1st dan -> advance to 3rd dan. Each has a 3-act structure, 1~2 hours per session.
Use Cases:
- One new player learns 1:1 with the GM
- Learn how a specific class is operated
- Experience the initial Three Ways and Six Hearts choice
- Warm up a character before group play
#Scent (香)
#Sense of the First Scene
A solo session begins in a single room. One player, one GM. Behind them are the empty seats of companions who have not yet joined.
The common opening always begins with the same single breath: the direction of the wind, the smell of earth, a distant bell. With only those three senses, establish the season and its weight.
In a 1st-dan hand, the weight of a weapon is still unfamiliar. The gear is new, and the seal has not faded. This scenario exists to make that first sensation memorable.
#Voices of Key NPCs (Common Prologue)
Old Man Pointing the Way (shared entrance NPC for each scenario):
"Are you alone? ...Alone is how it starts. Everyone was alone at first."
"I do not know what you will see at the end of this road, but when you return, you will not be alone. Whether it is a shadow, a burden, or a name."
The 1st-dan self (inner voice, recalled on entering Act 3):
"...Yesterday's self could not have come this far. Today's self is here."
#Mood Turns
Each scenario's turn shares the same rhythm.
- Act 1 Silence: before the first enemy appears, the GM leaves two breaths empty. When the player asks, "...Why aren't you saying anything?", that silence is the scent.
- Act 2 Acceleration: the moment the core mechanic first triggers. Before the dice for the check roll, the GM slowly says the technique's name one more time.
- Act 3 Choice: the Three Ways and Six Hearts branch; the music stops. The GM prepares two sentences and chooses one only after hearing the player's answer.
#Background Music and Color (Tone by Scenario)
| Scenario | Primary Colors | Lighting Tone | BGM Image |
|---|---|---|---|
| Samurai: Bridge | blue-gray, brown wood | harsh noon sunlight | single drum, wide spacing |
| Ronin: Core Zone | black and silver | low orange torchlight | breathing, wind |
| Esoteric Monk: Abandoned Temple | faded vermilion, moss green | blue moonlight | wooden fish and distant temple bell |
| Shinobi: Inside the Castle | ink black and indigo | moonless night | eaves dripping water, almost nothing |
| Gaijin: Beach | gray sea, white powder smoke | overcast day | waves and metal |
| Onmyoji: Shrine | orange pillars, young bamboo green | dawn | one daegeum (大笒) note |
| Scholar: Siege | earth tones, smoke gray | red sunset | distant drums and nearby whispers |
| Entertainer: Convoy | ocher, vivid scarlet cloth | sunlight in dust | bells and strings (弦) |
| Shugenja: Mountain | rock gray, water clarity | white light in fog | water sounds, breathing |
| Puppeteer: Castle | white thread, castle-wall shadow | indoor candlelight | many strings (弦), breaking |
#Common Structure
| Act | Content | Dan in Play · End Advancement |
|---|---|---|
| Act 1 | Introduction: problem appears, PC decides to get involved | 1st dan · advance to 2nd dan at the end |
| Act 2 | Development: core mechanic combat / check | 2nd dan |
| Act 3 | Ending: Three Ways and Six Hearts choice + 3rd dan advancement | 2nd dan · advance to 3rd dan at the end |
[Variant · Tutorial Advancement]
This scenario compresses advancement requirements. Immediately after Act 1, advance to 2nd dan and apply only the canonical 2nd-dan growth. Immediately after Act 3, advance to 3rd dan and apply only the canonical 3rd-dan trait. Do not gain the same dan's growth reward twice. The completed character joins group play at 3rd dan.
#Solo Encounter Execution Contract
- A
[Check Scene]does not start combat. A[Combat]uses only the block, count, formation, and ending condition listed below. Do not invent a block or numeric values from an enemy name alone. - An enemy linked to an external canonical block uses that block unchanged. The two tutorial individual blocks below are scenario-specific abbreviated blocks shared by unnamed human and yoma enemies.
- Tutorial Veteran Individual: Wounds 2, Defense 11, Energy 8, key attribute +2. Basic attack costs 2 Energy and rolls
2d10+key attribute>=Defensefor 1 Wound. No special techniques. - Tutorial Elite Individual: Wounds 3, Defense 13, Energy 9, key attribute +2. Its basic attack is the same. Once per combat, it may spend 3 Energy to make the same check for 2 Wounds.
- A
Mob groupis a bundle of individuals using the canonical Mob rules. Only a row marked "threat type" lets the whole group make one simple attack at the end of a round.
All Alternative Exit Actions below are [Kata] used on your breath; they create no separate reaction timing. On failure, the Energy and use limit are consumed and combat continues.
| Action | Energy · Limit | Check and Result |
|---|---|---|
| Sealing Barrier | 3, 1/combat | 2d10+Wisdom+Exorcism >= 13. On success, the Konryu Fragments are pushed outside the Barrier and the encounter ends. |
| Exorcism | 2, 1/round | Target the armored Onryo and roll 2d10+Wisdom+Exorcism >= Defense. Gain 1 Exorcism mark on success; at 2 marks, the Onryo withdraws and the encounter ends. |
| Appease Grudge / Forced Seal | 4, 1/combat | Choose one of the two portrayals and roll 2d10+Wisdom+Exorcism >= 13. On success, the Onryo and Konryu Fragments withdraw and the encounter ends. |
| Bailing | 2, 1/round | 2d10+Wisdom+Craft >= 11. On success, reduce the Flooding Clock by 1(minimum 0). The clock starts at 1 and rises by 1 at a lull while the Funayurei squad remains; at 3, abandon the vessel and withdraw. |
| Shore Bombardment | 4, 1/round | Only from a harbor or land zone, roll 2d10+Archery >= 11. Gain 1 hit mark on success; at 2 marks, the Umibozu withdraws. |
| Shikigami Seal | 2, 1/round | Target 1 runaway shikigami in the same or an adjacent zone and roll 2d10+Wisdom+Sorcery >= Defense. On success, seal that shikigami and remove it from the battlefield. |
| Reseal Nue | 4, 1/combat | 2d10+Wisdom+Sorcery >= 15. On success, return the Nue to the shrine's Barrier and end the encounter. |
| Bargain with Nue | 3, 1/combat | Roll 2d10+Presence+Negotiation vs the Nue's 2d10+Courage(2)(defender wins ties). If the check succeeds and the PC accepts the narrative price demanded by the Nue, it withdraws and the encounter ends. |
| Surrender / Persuade | 2, 1/combat | When a human target has Wounds 1 or lower, or the PC gained negotiation leverage in an earlier scene, roll 2d10+Presence+Negotiation vs the target's 2d10+Courage(2)(defender wins ties). On success, the target surrenders or withdraws and the encounter ends. |
| Bridge Demolition | 3, 1/combat | After completing 2 Hold Rounds below, roll 2d10+Courage+Swordsmanship >= 11. On success, cut the prepared bridge supports and end the encounter. |
| Escort Withdrawal | 3, 1/round | Choose noncombat civilians or a convoy in the same or an adjacent zone and roll 2d10+Presence+Performance >= 11. On success, move them 1 step into an adjacent rearward zone. Permanently sacrifice a cart or supplies as bait to succeed without a check; this automatic success is 1/combat. Civilians and convoys are not separate combat units and do not attack. |
| Drive with Rapids | 3, 1/round | Target a mountain yoma in the waterfall zone and roll 2d10+Physique+Martial Arts vs 2d10+Physique(2)(defender wins ties). On success, force-move the yoma into an adjacent zone toward the outside. If it leaves the waterfall, the encounter ends. |
| Puppetization Ritual | 4, 1/combat | After the castle lord reaches Wounds 1 or lower or surrenders, roll 2d10+Wisdom+Craft vs 2d10+Courage(2)(defender wins ties). On success, the encounter ends and the lord becomes a puppet in the follow-up narrative, but you gain no separate combat unit or numeric statistics. |
A Hold Round is a round whose lull begins with the PC at Wounds 1 or higher and no enemy having entered the Rear Zone. A row requiring consecutive Hold Rounds must satisfy this condition without interruption.
Uncommanded Deployment: a squad listed below as uncommanded has no Energy of its own. From the first round onward, roll once per squad at count 1 on the specified Uncommanded Action Table and resolve only that result. A volley attack uses the weapon or technique named in that row.
Runaway Shikigami: runaway shikigami also have no Energy of their own. From the first round onward, at count 1 each unsealed shikigami moves 1 step toward the nearest adjacent zone in the direction of the Outside Zone. If even one reaches the Outside Zone, the encounter ends in pursuit failure. This is the encounter's enemy-side escape action, not an action that consumes one of the Onmyoji's control uses.
| Scenario and Checkpoint | Check or Combat | Canonical Link or Block | Count and Formation | Victory or Withdrawal Condition |
|---|---|---|---|---|
| Samurai Act 1 | [Combat] | canonical Mob, staged as ko-oni | threat-type group of 5 Mobs | remove 3 or complete 1 Hold Round. May withdraw through the Rear Zone |
| Samurai Act 2 | [Combat] | Tutorial Veteran Individual | 2 oni warriors, entering one at a time | defeat both, or prevent each from moving Front Zone→Rear Zone for 1 round. May retreat to the village |
| Samurai Act 3 | [Combat] | canonical Oni Elite + canonical Mob | 1 Oni Elite + 3 threat-type Mobs | reduce the oni to Wounds 0, or complete 2 Hold Rounds then succeed at Bridge Demolition. May retreat to the village |
| Ronin Act 1 | [Check Scene] | Finesse+Infiltration vs TN 11 | 1 guard patrol | bypass on success; on failure spend 2 Energy to disengage, or withdraw |
| Ronin Act 2 | [Check Scene] | canonical free Core entry and movement | 1 boundary | reach the courtyard. No failure; Energy management is the result |
| Ronin Act 3 | [Combat/Conversation] | Tutorial Elite Individual | 1 general | Wounds 0, succeed at Surrender / Persuade, or abandon the assassination and leave through the perimeter |
| Esoteric Monk Act 1 | [Combat] | canonical Konryu Fragment | 1 Minion squad (3 bodies, Defense 9, Cohesion 3, Erosion, uncommanded Berserk Table) | succeed at Sealing Barrier or remove the squad. May withdraw outside the temple |
| Esoteric Monk Act 2 | [Combat] | canonical armored Onryo | 1 Onryo | Wounds 0 or 2 Exorcism marks. May withdraw to the perimeter |
| Esoteric Monk Act 3 | [Combat/Ritual] | armored Onryo + Konryu Fragment canonical blocks | 1 Onryo + 1 Minion squad (3 bodies, Defense 9, Cohesion 3, Erosion, uncommanded Berserk Table) | succeed at Appease Grudge / Forced Seal, or remove both. Withdrawal allowed |
| Shinobi Act 1 | [Check Scene] | Finesse+Ninjutsu vs guard Perception 11 | 1 perimeter guard patrol | enter the interior. On failure, may withdraw with Shadow Crossing |
| Shinobi Act 2 | [Check Scene] | Finesse+Ninjutsu vs lady-in-waiting Perception 13 | 1 lady-in-waiting | secure the letter. Failure only raises the alarm |
| Shinobi Act 3 | [Combat/Escape] | Tutorial Elite Individual | 1 final bodyguard | subdue the bodyguard or reach the Outside Zone with the letter |
| Gaijin Act 1 | [Combat] | canonical Funayurei | 1 Minion squad (5 bodies, Defense 12, Cohesion 3, Bucket, uncommanded Berserk Table). Resolve attack results with Bucket | remove the squad or survive 2 rounds while the Flooding Clock remains below 3. May withdraw to the harbor |
| Gaijin Act 2 | [Combat] | Tutorial Veteran Individual | 1 pirate | Wounds 0 or succeed at Surrender / Persuade. May withdraw through the Rear Zone |
| Gaijin Act 3 | [Combat] | canonical Umibozu | 1 Umibozu | Wounds 0 or 2 Shore Bombardment hit marks. May abandon the ship |
| Onmyoji Act 1 | [Check Scene] | canonical Shikigami Control | 1 runaway shikigami | recover command with Wisdom+Sorcery>=11. Failure continues the pursuit |
| Onmyoji Act 2 | [Combat/Seal] | canonical Shikigami | the PC and 2 runaway shikigami start in the Front Zone main hall. Each shikigami has Wounds 1 and Defense 12, and at count 1 escapes along the 2-step Front Zone→Flank Zone→Outside Zone route | seal both shikigami or reduce both to Wounds 0. If one reaches the Outside Zone, the pursuit fails. May withdraw from the main hall |
| Onmyoji Act 3 | [Combat/Deal] | canonical Nue | 1 Nue | Wounds 0, Reseal Nue, or complete Bargain with Nue. May withdraw from the shrine |
| Scholar Act 1 | [Check Scene] | Wisdom+Stratagem>=11 | 1 enemy formation | reveal enemy formation on success; failure makes the first allied command in Act 2 cost +1 Energy |
| Scholar Act 2 | [Squad Combat] | canonical Minion | 2 allied ashigaru squads(yari, Defense 11, Cohesion 3, PC-commanded) and 2 enemy ashigaru squads(yari, Defense 11, Cohesion 3, uncommanded Regular-Army Table), 5 bodies each | collapse 1 enemy squad or withdraw 1 allied squad through the Rear Zone |
| Scholar Act 3 | [Check Scene] | Wisdom+Stratagem>=13 or Presence+Negotiation>=13 | 1 lord and 1 deputy | adopt the frontal or ambush plan. On failure, withdraw beyond the castle |
| Entertainer Act 1 | [Combat] | Tutorial Veteran Individual | 1 bandit; civilians and convoy start in the Front Zone | Wounds 0, succeed at Surrender / Persuade, or succeed at Escort Withdrawal by sacrificing a cart |
| Entertainer Act 2 | [Combat] | Tutorial Veteran Individual | 1 mountain yoma; civilians and convoy start in the Front Zone | Wounds 0, or move every civilian into the Rear Zone with Escort Withdrawal. Convoy withdrawal allowed |
| Entertainer Act 3 | [Combat/Conversation] | Tutorial Veteran Individual | 1 traitor; civilians and convoy start in the Front Zone | Wounds 0, succeed at Surrender / Persuade, or succeed at Escort Withdrawal by sacrificing supplies |
| Shugenja Act 1 | [Check Scene] | Physique+Fortitude>=11 | 1 dangerous route | succeed or spend 1 Wound to break through. May descend the mountain |
| Shugenja Act 2 | [Combat] | Tutorial Veteran Individual | 1 mountain yoma, starting in the waterfall zone | Wounds 0 or move it outside the waterfall with Drive with Rapids. May descend the mountain |
| Shugenja Act 3 | [Check Scene] | Wisdom+Bearing>=13 or Courage+Fighting Spirit>=13 | 1 inner-shadow scene | choose completion or reconciliation. Even on failure, descend and retain the follow-up hook |
| Puppeteer Act 1 | [Check Scene] | puppet Finesse+Infiltration>=11 | 1 gate guard patrol | get the puppet through. On failure, puppet Wounds -1 or withdraw |
| Puppeteer Act 2 | [Combat] | canonical Minion | puppet at the Flank Zone castle gate; 1 guard squad(yari, 3 bodies, Defense 11, Cohesion 3, uncommanded Defensive-Mission Table) in the Front Zone corridor; the lord's room is the Core Zone | remove the squad or reach the lord's room using the common Breakthrough and Core Zone entry rules. The controller may withdraw |
| Puppeteer Act 3 | [Combat/Domination] | Tutorial Elite Individual | 1 castle lord | Wounds 0, surrender, or succeed at Puppetization Ritual. May cut the thread and withdraw |
#1. Samurai: Guardian on the Bridge (橋上の守)
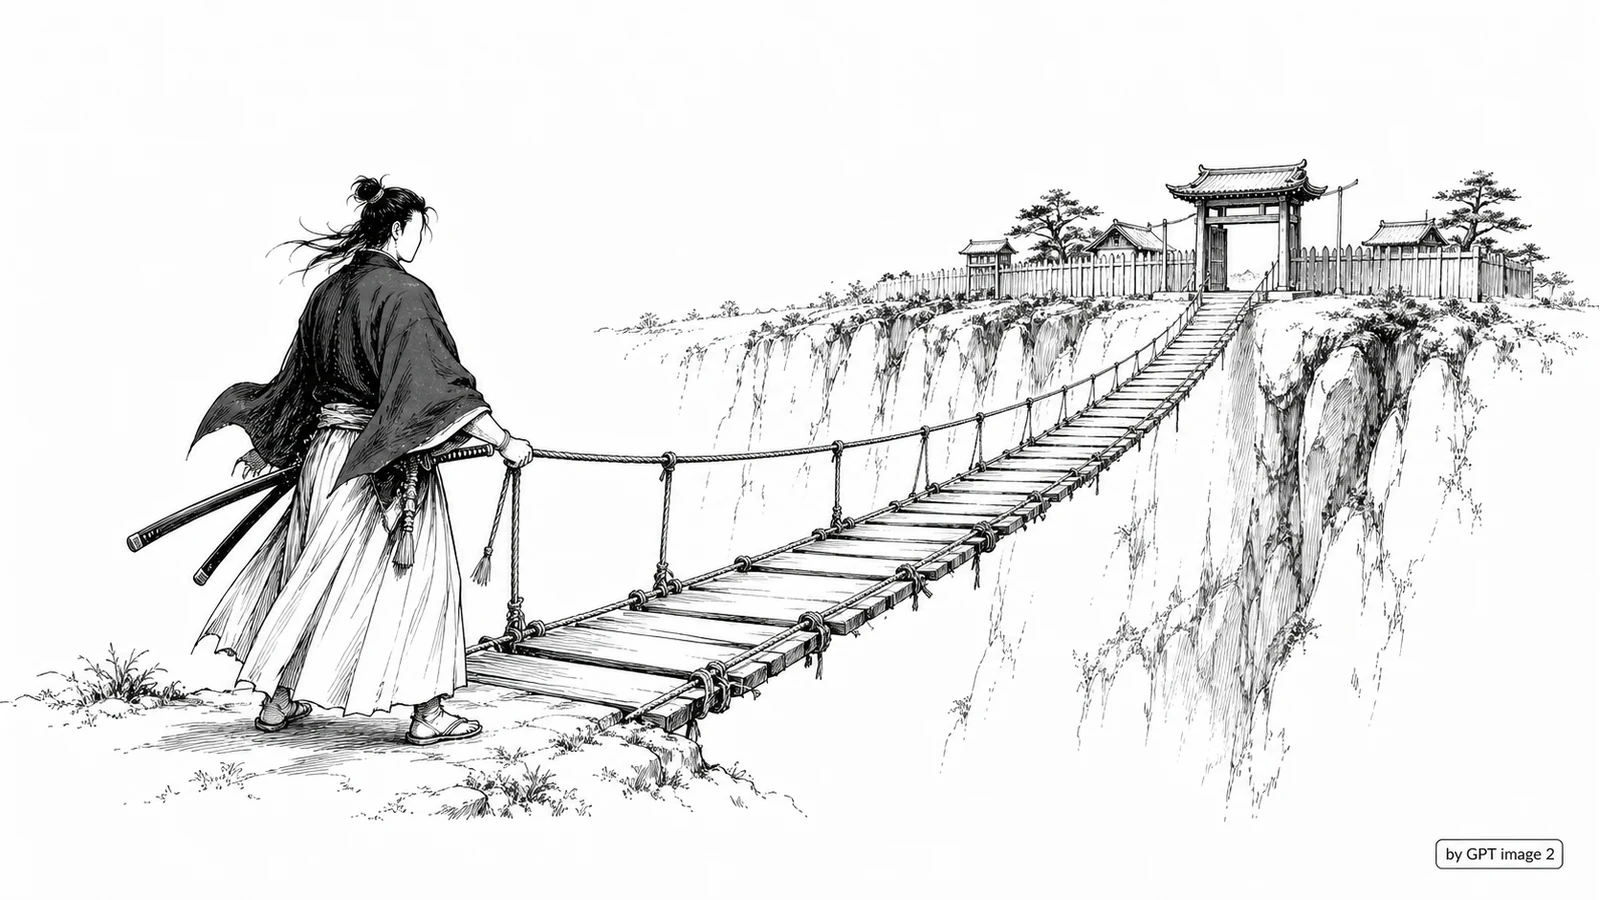
#Scent
The noon sun pours down onto the bridge. The wooden planks drink the light and give off the smell of hot, dry timber. The gorge below is so far down that the wind reaches you before the sound.
The bridge is narrow. If two people stand face to face, one must step aside. Only you are here, and behind you is the village bell. It rings once and carries for a long time.
Old woman at the edge of the village: "Young master, we repair that bridge twice every year. This year may become the third."
The primary colors are blue-gray and the hot brown of wood. The BGM is a slow beat from a single drum. The spaces are wide, and the wind fills them.
- Place: narrow wooden bridge. The only path into the village.
- Enemies: Act 1, 5 threat-type ko-oni Mobs -> Act 2, 2 Veteran oni warriors(one at a time) -> Act 3, 1 Oni Elite + 3 threat-type Mobs.
Core Mechanic Demonstration:
- Immovable Formation: Front Zone Domination +4. Exclusive control on a narrow bridge.
- Hold the Narrow Front: use Immovable Formation and Hold Rounds to prevent enemies from entering the Rear Zone.
- Parry Reservation: prepay 1 Energy / improvise for 2 Energy.
Three Ways and Six Hearts Branch:
- Burn the bridge to protect the village (innocent travelers are also sacrificed) -> Hegemony accumulation.
- Hold the bridge and take the enemy's attacks (accepting sacrifice) -> maintain Loyalty.
#Step-by-Step Progression Guide
| Checkpoint | Timing | What the GM Does | What the Player Does | Signal (to Next Step) |
|---|---|---|---|---|
| Act 1: ko-oni encounter | Session start | Describe bridge width and Domination structure | Declare Immovable Formation, occupy the Front Zone | Remove 3 Mobs or complete 1 Hold Round -> Act 2 |
| Act 2: oni warrior breakthrough | Middle | Admit only 1 Veteran at a time and provide Parry Reservation timing | Prevent each warrior from entering the Rear Zone for 1 round, or defeat it | Resolve both warriors -> captain appears |
| Act 3: oni captain + Mob group | Climax | Present bridge-collapse / village-fire choices | Declare Three Ways and Six Hearts; attack the captain or maintain Hold Rounds | Defeat the captain, or complete 2 Hold Rounds and demolish the bridge -> ending and 3rd-dan advancement |
- Success branch: defeat the captain, or complete 2 Hold Rounds and successfully demolish the bridge; the village remains safe. Confirm Loyalty or Hegemony as the heart.
- Failure branch: the bridge falls. The PC retreats wounded to the village; the next scenario becomes a revenge tale.
- GM control: make the advantage of the narrow terrain felt at least 1 time. At the moment Immovable Formation triggers, state clearly, "the enemy cannot pass you."
#2. Ronin: Path of the Core Zone (深部の道)
#Scent
The fortress Core Zone is where light pools. One torch, then another. Orange light gathers and spills from the seams between bricks. Footsteps sound twice on the stone floor: once yours, once the echo.
The employer's money is already in your coat. More than the weight of the contract, the sound of silver inside it bothers you. Did you come for money, or for your own name?
Guard muttering (leaking through the wall): "...Tonight is strangely quiet. The moon is not out either."
The primary colors are black and silver. The only BGM is your own breathing. Sometimes, the sound of wind chimes far away; only sometimes.
- Place: fortress Core Zone (courtyard). The ronin is a hired assassin.
- Enemies: Act 1, guard Minion -> Act 2, Core Zone breakthrough -> Act 3, assassinate the general.
Core Mechanics:
- Blade of the Wind: movement Energy -1 (walk 1).
- Free Core Zone Entry: enter without Breakthrough.
- Combo Fatigue Reduction (short weapon in Core Zone): the ninjato's 4th strike is only -1.
Three Ways and Six Hearts Branch:
- Assassinate the general as contracted (money first) -> maintain No Heart.
- Hear the general's circumstances and let him go -> shift to Truth.
#Step-by-Step Progression Guide
| Checkpoint | Timing | What the GM Does | What the Player Does | Signal (to Next Step) |
|---|---|---|---|---|
| Act 1: infiltrate guard Minions | Session start | Place enemies in the fortress perimeter, terrain where Blade of the Wind matters | Choose route, allocate Energy | Guard neutralized / bypassed -> enter Core Zone |
| Act 2: Core Zone breakthrough | Middle | Reconfirm the right to free Core Zone entry | Manage Combo Fatigue, use the ninjato 4th strike | Reach the courtyard -> before the general |
| Act 3: face the general | Climax | Present the general's circumstances (family, retainers) through RP | Declare Truth / No Heart choice | Carry out assassination or induce retirement -> 3rd dan advancement |
- Success branch: contract fulfilled or betrayal; either is a ronin-like conclusion. Fix the heart.
- Failure branch: discovered and surrounded by the general's guards. Mission fails after combat retreat; the employer's revenge becomes the next scenario hook.
- GM control: demonstrate free Core Zone entry as the privilege of "no Breakthrough check." In Act 1, provide the experience of skipping a check another class would have rolled.
#3. Esoteric Monk: Night of the Abandoned Temple (廢寺の夜)
#Scent
People left the mountain temple long ago. The roof is half-collapsed, and moonlight falls like white lines between the wooden beams. Moss grows in the yard; when you step, it makes a small wet sound.
A distant temple bell rings. But there is no temple nearby. Where is the bell coming from? You know: that bell is not ringing now. It rang on some night in the past, the last time it rang here.
Whisper from the collapsed main hall: "...Where are the prayer beads? Who took the prayer beads?"
The primary colors are faded vermilion and moss green, with the blue of moonlight laid over them. The BGM is a single wooden fish and a distant temple bell. Sometimes the wind shakes a wind chime, and that sound makes your hand seek the grip of the vajra.
- Place: abandoned mountain temple. Onryo appear.
- Enemies: Act 1, Konryu fragment Minion -> Act 2, vengeful spirit Elite (incorporeal) -> Act 3, higher Elite-grade great onryo.
Core Mechanics:
- Seal of Shura: Core Zone melee -1 Energy.
- Exorcism skill: Novice (1 point) adds its skill to Exorcism checks, bypasses incorporeal evasion, and applies normal Defense -2 against
[Incorporeal]attacks. The +2 attack bonus against yoma is the Licensed (3 points)Light of Exorcismeffect. See the Exorcism Exemption Table. - Vajra: sealed-flow standard. Effective against yoma.
Three Ways and Six Hearts Branch:
- Resolve the onryo's grudge (perform ritual, spend time) -> strengthen Compassion.
- Forced sealing (efficiency) -> toward Way of Emptiness: Void.
#Step-by-Step Progression Guide
| Checkpoint | Timing | What the GM Does | What the Player Does | Signal (to Next Step) |
|---|---|---|---|---|
| Act 1: Konryu fragment Minion encounter | Session start | Describe the abandoned temple's silence and moonlight | Approach the Core Zone with Seal of Shura, spend Energy | Sealing Barrier succeeds or the squad is removed -> Onryo appears |
| Act 2: Onryo Elite | Middle | Emphasize 50% incorporeal physical negation and make Exorcism's advantage felt | Hit with vajra or use Exorcism | Wounds 0 or 2 Exorcism marks -> Act 3 |
| Act 3: face the great Onryo | Climax | Present the grudge story through RP (state ritual time cost) | Declare Compassion ritual or Void forced sealing | Appease Grudge / Forced Seal succeeds -> 3rd-dan advancement |
- Success branch: grudge-resolution route; vow to rebuild a small temple on the abandoned site. Fame +1, Compassion heart confirmed.
- Failure branch — failed forced seal: the PC does not gain numeric
Curse +2. Instead, before the first lull of the next scenario, stage one spiritual-complication scene in which the Grudge of the Abandoned Temple returns. If the PC answers it with Exorcism or Sorcery, end the scene with no follow-up numeric effect. - GM control: alternate the effectiveness of Exorcism with the helplessness of non-Exorcism. For the ritual choice, perform "it takes time" through RP: truly leave one breath empty.
#4. Shinobi: The General's Secret Letter (將軍の密書)
#Scent
The castle roof tiles are wet with rain. The moon is behind clouds, and tonight's only light is a single candle beyond shoji paper. Raindrops fall from the eaves one by one, perfectly regular — breathe to that rhythm, and you cannot be seen.
The confidential document is in the general's study. You have already heard where it is. But information often lies.
Conversation between two castle patrols: "A shadow there... no, a roof tile slipped." / "Right. It must be nothing."
The primary colors are ink black and indigo. There is almost no BGM. Leave only the water dripping from the eaves. Even your own breathing is too loud.
- Place: inside an enemy castle. Steal a confidential document.
- Enemies: outer guard -> inner lady-in-waiting (Perception check) -> final bodyguard (Elite).
Core Mechanics:
- Shadow Crossing: Outside Zone <-> anywhere for 0 Energy
[Kata](1/round). - Infiltration check: 2d10+Finesse+Ninjutsu vs enemy Perception.
- Ambush: first attack check +2. The 3rd-dan shinobi
[Ambush]trait that makes the first attack after infiltration an automatic Critical Hit unlocks only after this scenario ends.
Three Ways and Six Hearts Branch:
- After stealing the letter, reveal the truth -> shift to Truth.
- Deliver it as hired -> Loyalty (loyalty to the employer).
#Step-by-Step Progression Guide
| Checkpoint | Timing | What the GM Does | What the Player Does | Signal (to Next Step) |
|---|---|---|---|---|
| Act 1: perimeter infiltration | Session start | Present castle wall and patrol timing | Declare Shadow Crossing 1 time, choose route | Outer guard passed -> enter inside |
| Act 2: lady-in-waiting and inner rooms | Middle | Opposed Perception check, clues to the letter's location | Infiltration check, hold Critical Hit | Letter secured -> bodyguard alarm |
| Act 3: final bodyguard | Climax | Reveal the letter's content through RP (hint at employer mastermind) | Declare Truth / Loyalty, choose escape route | Escape succeeds -> 3rd dan advancement |
- Success branch: silent escape. Depending on the heart, resolve through revelation / delivery; Fame rises.
- Failure branch: discovered. Open battle is impossible; the PC makes an emergency escape with Shadow Crossing and loses the letter.
- GM control: place enemies so the PC must feel either first attack +2 or inability to react from perimeter / Outside Zone entry at least 1 time. Preview the automatic Critical Hit on the first attack after infiltration only as the 3rd-dan trait gained at the end.
#5. Gaijin: One Shot on the Beach (海邊の一彈)
#Scent
The sea is gray. The coastline is far, and the waves break low. The smell of powder rides the wind; someone has already fired a shot. Before you arrived.
Several fishermen stop hauling their nets. They look at your clothing and your firearm. On this beach, no one can call your name. Few know your language.
Old fisherman (half-turned away): "...Are you also from a foreign land? Since yesterday, strange things have been coming up from the sea. Would you try shooting them with your weapon?"
The primary colors are the gray sea and white powder smoke. The BGM is waves and metal striking metal. A short prayer in a foreign tongue mixes with the wind; it is also your own voice.
- Place: harbor. Spirits, pirates, and a sea yoma threaten it in sequence.
- Enemies: Act 1, funayurei Minion -> Act 2, pirate Veteran -> Act 3, umibozu (Elite, underwater).
Core Mechanics:
- Foreign Gunpowder: teppo [Pierce all], 2d10+Archery >= Defense.
- Archery skill: covers bow / teppo.
- Underwater zone: Unarmed Combat +2, firearms unavailable.
Three Ways and Six Hearts Branch:
- Defeat the pirate Veteran -> Hegemony.
- Accept the pirate Veteran's surrender and interrogate them -> Truth (gain information).
#Step-by-Step Progression Guide
| Checkpoint | Timing | What the GM Does | What the Player Does | Signal (to Next Step) |
|---|---|---|---|---|
| Act 1: funayurei Minions | Session start | Portray fog, auditory hallucinations, and the Flooding Clock | Remove the squad with teppo fire, or bail while holding out | Remove the squad, or survive 2 rounds with Flooding below 3 -> pirate appears |
| Act 2: pirate Veteran | Middle | Present one Veteran individual's range pressure and negotiation leverage | Alternate Archery and gunpowder, or use Surrender / Persuade | Pirate Wounds 0 or Surrender / Persuade succeeds -> umibozu appears |
| Act 3: umibozu | Climax | Explain both the land bombardment line and the underwater zone's firearm restriction | Choose Shore Bombardment or direct combat | Wounds 0 or 2 bombardment hit marks -> 3rd-dan advancement |
- Success branch: harbor secured. If the pirate Veteran is interrogated, grant an information reward; if defeated, grant a Fame reward.
- Failure branch: dragged underwater. The gaijin's weakness (underwater) is exposed; provide an opportunity through the harbor merchants' next contract.
- GM control: in Act 1, make sure the player fires "teppo [Pierce all], 2d10+Archery >= Defense" at least once. In Act 3, disclose the difference between Shore Bombardment and direct underwater combat before the player chooses.
#6. Onmyoji: Silence of the Shrine (神社の沈黙)
#Scent
It is dawn. The shrine torii divides the sky in two: red pillars on one side, tender bamboo green on the other. The air is just letting go of night. It is cold, but not heavy.
But sealing papers have fallen. One sheet. Then another. The wind did not blow them down; they were pushed from the inside.
Old shrine priest (not even properly dressed): "...It has been strange since late last night. The shikigami walked around on its own. It would not come when I called."
The primary colors are orange pillars, young bamboo green, and dawn blue. The BGM is one long-held daegeum (大笒) note. The sound of the seal breaking seeps between those notes.
- Place: guardian shrine. The seal is coming undone.
- Enemies: Act 1, runaway shikigami -> Act 2, group of breakaway shikigami -> Act 3, sealed yoma (Elite).
Core Mechanics:
- Shikigami Control: 1 shikigami at 1st dan.
- Sorcery Licensed (2nd-dan growth for this pregen path): invest only 1 of the 2 skill points gained at 2nd dan into the starting Sorcery Novice(2 points), raising it to Licensed(3 points), and allocate the remaining 1 point freely. This path uses Sorcery attacks into adjacent zones.
- Barrier: sealing ritual.
Three Ways and Six Hearts Branch:
- Kill the yoma -> Truth.
- Bargain with the yoma (expand the shikigami contract) -> edge of Demon.
#Step-by-Step Progression Guide
| Checkpoint | Timing | What the GM Does | What the Player Does | Signal (to Next Step) |
|---|---|---|---|---|
| Act 1: shikigami runaway | Session start | Present strange signs in the shrine and cracks in the seal | Activate Shikigami Control for 1 shikigami, search route | Chase begins -> breakaway group encountered |
| Act 2: breakaway shikigami group | Middle | Explain Sorcery Licensed attacks into adjacent zones and the count 1 escape action | Stop the escape with Shikigami Seal or attacks | Seal both shikigami or reduce both to Wounds 0; if one reaches the Outside Zone, proceed to Act 3 through the failure branch |
| Act 3: face the sealed yoma | Climax | RP the yoma's bargain offer (temptation of a narrative pact) | Declare Truth / Demon; choose resealing, bargaining, or combat | Wounds 0, Reseal Nue, or Bargain with Nue succeeds -> 3rd-dan advancement |
- Success branch: Truth route -- maintain the shrine and gain recognition as the village guardian. Demon route -- record the narrative pact with the Nue and the heart shift, but do not increase shikigami summon count or grant another combat unit.
- Failure branch: Barrier collapse. The PC barely escapes; rumors of yoma spread through the village and lead into the next scenario.
- GM control: imprint the limit of 1 shikigami in Act 1 -> after 2nd-dan advancement, provide the felt change from Sorcery Licensed in Act 2. Package Demon temptation as "gain without loss."
#7. Scholar: Siege Stratagem (攻城の策)
#Scent
Sunset stains the castle wall red. Cannon smoke rises slowly from the horizon and clouds the sky. On the table where the map lies open, your finger has already pressed the same spot several times; this time, the place is worn thin.
The lord stands atop the wall. You sit behind him. That is your place: the place where words, not blades, are the weapon.
Castle lord (without looking your way): "Do you have a plan? There is no time. Before night falls."
Deputy commander (副將) (low voice): "...Teacher's plan may be called cowardly, but there are three hundred soldiers left in the castle. An honest fight is a luxury."
The primary colors are earth tone, smoke gray, and sunset red. The BGM is drums in the distance and whispers nearby. The brush at your fingertips is the closest sound.
- Place: besieged castle. The scholar is an adviser.
- Enemies: many enemy squads (combat centers on squad command).
Core Mechanics:
- Divine Calculation and Ghostly Strategy: squad command costs 1 Energy at Wisdom +2 or higher.
- Squad order 1 Energy (Wisdom+2 or higher).
- Stratagem check: information gathering, terrain analysis.
Three Ways and Six Hearts Branch:
- Win through schemes (choose cowardice) -> Void.
- Recommend a direct confrontation -> Truth.
#Step-by-Step Progression Guide
| Checkpoint | Timing | What the GM Does | What the Player Does | Signal (to Next Step) |
|---|---|---|---|---|
| Act 1: analyze the situation | Session start | Present siege map and chance for a Stratagem check | Roll 2d10+Wisdom+Stratagem, identify enemy squads | Analysis complete -> squad command authority granted |
| Act 2: squad command battle | Middle | Reveal both sides' squad blocks and the enemy's uncommanded Regular-Army Table | Spend the scholar's own Energy to issue 1-Energy commands to 2 allied squads | Collapse 1 enemy squad or withdraw 1 allied squad through the Rear Zone -> lord's choice |
| Act 3: propose final battle | Climax | Present Void (ambush scheme) vs Truth (frontal) plans | Declare heart, issue final order | Scheme executed or frontal battle -> 3rd dan advancement |
- Success branch: castle defense succeeds. Void route gives minimal sacrifice plus controversy; Truth route causes heavy losses but preserves honor.
- Failure branch: squad destroyed. Castle falls; branded as a defeated adviser. Leads to a rescue scenario.
- GM control: state from Act 1 that the scholar wins by checks and commands, not direct combat. Squads have no Energy of their own and cannot receive transferred Energy; make the efficiency of 1-Energy squad command felt numerically.
#8. Entertainer: Convoy (輸送隊)
#Scent
Sunlight falls slantwise through dust. Cart wheels creak, and horses' breath lifts the dirt. Behind the convoy are three children, four mothers, and you.
You are not a fighter. You are a singer. But today, those two are the same thing.
Convoy captain (blunt but tired voice): "...Master singer, I leave the children to you. While our spears go forward, let your voice become their spear."
Child (awkwardly copying one phrase of the song): "...Sister, what are the next lyrics?"
The primary colors are ocher, vivid scarlet cloth, and sunlight in dust. The BGM is bells and strings (弦). A child's laughter drifts over it now and then.
- Place: outdoor escort. Transporting supplies.
- Enemies: Act 1, bandits -> Act 2, yoma raid -> Act 3, traitor.
Core Mechanics:
- Battlefield Flower: during a lull, recover Wounds 1 or Cohesion 1 (no Energy).
- Presence Aura: Domination +Presence.
- Comfort (noncombat): maintain civilian morale.
Three Ways and Six Hearts Branch:
- Prioritize completing the transport (accept civilian sacrifice) -> Loyalty.
- Prioritize protecting civilians (transport may fail) -> Compassion.
#Step-by-Step Progression Guide
| Checkpoint | Timing | What the GM Does | What the Player Does | Signal (to Next Step) |
|---|---|---|---|---|
| Act 1: bandit attack | Session start | Describe convoy formation and civilian positions | Reinforce Domination with Presence Aura | Bandit Wounds 0, Surrender / Persuade, or Escort Withdrawal -> first lull |
| Act 2: yoma raid | Middle | Provide a chance to use lull recovery and check civilian morale | Recover with Battlefield Flower and attempt Escort Withdrawal | Yoma Wounds 0 or every civilian reaches the Rear Zone -> traitor revealed |
| Act 3: face the traitor | Climax | RP the dilemma of transport completion vs civilian protection | Declare Loyalty / Compassion, make final decision | Transport resolved -> 3rd dan advancement |
- Success branch: Loyalty: supplies arrive, merit for the Domain (藩). Compassion: every civilian survives, becoming a song of the people.
- Failure branch: traitor seizes the convoy. The PC retreats wounded; revenge scenario hook.
- GM control: between Act 1 and Act 2, always demonstrate the scene where "during a lull, recover Wounds 1 or Cohesion 1" happens without Energy cost. Imprint the entertainer's staying power numerically.
#9. Shugenja: Mountain Austerity (山の苦行)
#Scent
The mountain is vast. But the place you climb today is only one branch of that mountain. Fog rises to your waist, and each breath vanishes into it. Beneath your soles is wet stone.
The waterfall can be heard from far away. The sound of water grows, and a moment comes when it overlaps the beat of your chest. In that moment, you know you have entered the first stage of austerity.
Old monk at the mountain entrance (not stopping you, only pressing his palms together): "...What have you come to discard? Having something to discard means you are still human."
The primary colors are rock gray and the clear blue of water. In the fog, every color is washed once. The BGM is water and your own breathing. When those two diverge, it is austerity; when they overlap, it is liberation.
- Place: harsh mountain. Austerity training.
- Enemies: Act 1, trials of nature -> Act 2, mountain yoma -> Act 3, shadow of the self.
Core Mechanics:
- 3 Stages of Austerity: cost Wounds -1/2/3, checks +2/4/6 + damage +1/2/3.
- Self-Sacrifice: Wounds do not naturally recover during a lull (other healing only).
- Underwater zone: waterfall austerity.
Three Ways and Six Hearts Branch:
- Complete the austerity -> Truth (pursuit of truth).
- Abandon the austerity -> Compassion (retain humanity).
#Step-by-Step Progression Guide
| Checkpoint | Timing | What the GM Does | What the Player Does | Signal (to Next Step) |
|---|---|---|---|---|
| Act 1: natural trial | Session start | Present harsh path, waterfall, and cold as check targets | Declare austerity stage 1, accept Wounds cost | First trial passed -> mountain yoma manifests |
| Act 2: mountain yoma | Middle | Tempt with austerity stage 2: present cost and reward | Fight in the underwater waterfall zone, or use Drive with Rapids | Yoma Wounds 0 or forced outside the waterfall -> inner shadow descends |
| Act 3: the inner self | Climax | The shadow mocks the PC's memories back at them | Declare Truth / Compassion, whether to take austerity stage 3 | Shadow overcome / reconciled -> 3rd dan advancement |
- Success branch: Truth: austerity completed, recorded as a legendary shugenja. Compassion: humanity retained, bond with people below the mountain.
- Failure branch: Wounds bottom out. The PC falls behind during the descent and is rescued. Before the first lull of the next scenario, stage one spiritual-complication scene in which the shadow returns; if the PC faces and answers it, end the scene with no numeric curse.
- GM control: strictly apply the Wounds cost of austerity stages numerically. Present the stage 3 choice as "the threshold of death"; that is the shugenja's essence.
#10. Puppeteer: Hegemony of the Castle (城の支配)
#Scent
You yourself are outside the castle. The distant wall is a black shadow, and a single candle leaking from the lord's room is the only mark. Threads stretch from your fingertips: unseen, but felt.
The puppet is inside the castle. Your breath is yours, and the puppet's steps are your thought. Two existences are linked by one pulse, and when that pulse snaps, it is not only the puppet that breaks.
Puppet's voice (coming from the puppet's mouth though your lips do not move): "...Does the lord sleep alone again tonight?"
Your own voice (heard by no one): "There is no alone. I am with you."
The primary colors are white thread and castle-wall shadow. The BGM is many strings (弦) breaking. When one string snaps, you lose Wounds 1.
- Place: enemy castle. Remote assault by puppet.
- Enemies: Act 1, gate guards -> Act 2, internal squad -> Act 3, castle lord (Elite).
Core Mechanics:
- War of Strings: 1 puppet (Wounds 2, Defense 12, thread range 2 zones).
- Backflow: when a puppet is incapacitated, the operator takes Wounds -1.
- Split Existence: the operator stays in the Outside Zone.
Three Ways and Six Hearts Branch:
- Execute the castle lord -> Hegemony.
- Puppetize the castle lord (make a straw-man king) -> Demon.
#Step-by-Step Progression Guide
| Checkpoint | Timing | What the GM Does | What the Player Does | Signal (to Next Step) |
|---|---|---|---|---|
| Act 1: gate guards | Session start | State puppet range 2 zones, set the operator's hidden position | Deploy War of Strings, control puppet | Pass the gate -> encounter internal squad |
| Act 2: internal squad | Middle | Explain Backflow risk and the corridor / Core Zone breakthrough conditions | Maintain Split Existence; remove the squad or break through with the puppet | Remove the squad or the puppet reaches the lord's room -> Act 3 |
| Act 3: castle lord duel | Climax | RP choice: Hegemony (execution) vs Demon (puppetization) | Declare heart, final thread manipulation | Lord handled -> 3rd dan advancement |
- Success branch: Hegemony: Domain replacement, outward normalcy. Demon: straw-man king, PC's shadow rule. Confirm heart.
- Failure branch: puppet destroyed + operator exposed. PC flees; the castle hunts this calamity, creating a wanted-person hook.
- GM control: the puppeteer's appeal is the double structure: "the operator is safe; the puppet fights." Make the pain of Backflow felt at least 1 time. Demon temptation should be the sweetness of perfected control.
#Pregenerated 1st-Dan References
(For each class's basic 1st-dan build, see the corresponding class file.)
#GM Advice
- 1:1 Session: one player, one GM. Dense RP is possible.
- 3rd-Dan Advancement Finish: each scenario compresses 1st dan -> 3rd dan into 1~2 sessions. Learning purpose.
- Three Ways and Six Hearts Record: on 3rd-dan advancement, confirm Way / Heart. It continues into later group play.
- Class Emphasis: each scenario is designed to deeply experience one most central mechanic of that class.