#Weapon Catalog (武器圖鑑)
Contents
Like Dark Souls, weapons determine tactics. Even the same "katana" creates a completely different fight depending on its form.
Related Entries: Maneuver System · Schools · Balance Standards
#Weapon Grades
| Grade | Description | Technique Count |
|---|---|---|
| Issue Gear (普及品) | Mass-produced. Ashigaru standard. | Attack A + Attack B + Defense = 3 |
| Fine Work (業物) | A quality weapon touched by an artisan's hand. | 3 + licensed technique = 4 |
| Masterwork (名品) | A named weapon. Its own story. | 4 + masterwork technique = 5 |
Issue Gear can be bought in markets. Fine Works are commissioned from artisans or taken as loot. Masterworks are scenario rewards or legacies.
#Defense Bypass and Pierce Tag Guide
Defense bypass in this catalog's weapon techniques uses the 3 families of
[Pierce],[Direct], and[Incorporeal]fromco-03-05§Defense and Bypass System.Defense -Nis a status/weakening effect, and[Break]is a support effect for equipment damage.
| Notation | Category | Effect | Minimum Floor |
|---|---|---|---|
[Pierce N] | defense bypass | Ignore N points of armor/shield addition (N=a number or all). No effect against unarmored enemies. | 10 |
[Direct N] | defense bypass | Ignore N points of evasion, stance, Barrier, terrain, or sorcery bonuses. Armor/shields remain. | 10 + armor/shield addition |
[Incorporeal] | defense bypass | Bypass Defense itself. Apply the defender's Exorcism rank exemption table. | by Exorcism rank |
Defense -N | status/weakening | Binding or weakening debuff. Final Defense -N. Not an attack tag. | 2 |
[Break] | equipment damage support | The reduction from the accompanying [Pierce N] applies permanently until repaired. If the target equipment grade is higher than the acting equipment, only the break component is immune. | same as [Pierce] |
Notation position: Keep check formulas in the single form 2d10 + modifier >= Defense; list tags in the effect area. Example: 2d10+Finesse+Swordsmanship >= Defense | [Pierce 2]. 1 Wound.
Weapon application baseline: teppo, arrows, and thrusting lines =
[Pierce]/ shuriken and concealed-weapon throws =[Direct]or[Pierce]/ spirit talismans and spirit blades =[Incorporeal]/ large bludgeon Critical Hits =[Pierce] + [Break].A reserved defense technique's "+1 Defense while reserved" is a non-armor bonus from a weapon-technique stance. It is therefore negated by
[Direct](armor/shield bonuses remain), per co-03-05 §Defense and Bypass System. (Techniques: Scabbard Block, Haft Guard, Bow-Stave Block, Kunai Guard.)
#Attack Support Notation: Light
[Light/輕量](a tag at the level of an attack technique): even on a Critical Hit, the Wounds do not increase(stays at 1 Wound). Applied to 1-Energy, 1-Wound direct-damage techniques. It is the data definition of a "weak attack," in contrast to standard(2 Energy, 1 Wound, 2 Wounds on a Critical Hit) and killing-blow(nodachi/zanbato, 3 Wounds on a Critical Hit). Effects that explicitly set the Critical Hit Wound value(nodachi and the like) and "treat as ordinary" effects(the Wildlander's Hand of Kamuy) take priority. Details: co-03-05 §Critical Hit.List of Light techniques: (blade weapons) Kodachi Continuous Cuts, Ninjato Reverse-Grip Cut / (spear weapons) Teyari Thrust / (bow weapons) Hankyu Quick Shot / (short weapons) Tanto Thrust, Inside the Guard, Kaiken Stealth Thrust, Makiri Hunting Cut, Skinning Cut, Kunai Throw, Close Thrust, Fist Strike.
Balance dial — accuracy ±N: weapons and techniques are tuned not only by Energy and Wounds but also by an accuracy modifier. A "hard-to-land weapon/technique" takes accuracy -, while a "precise technique" takes accuracy +(possible even when it is not a masterwork).
Breath-limit principle: breath limits are placed only on (a) licensed techniques, (b) status/control add-on effects such as forced movement, disarm, defenseless, bleeding, sealing, binding, or knockdown, and (c) techniques that combine defense or movement. A pure-damage basic attack with no add-on effect carries no breath limit(5 per breath + Combo Fatigue keep it in check).
#Weapon Identity (武器の役割)
Weapons other than short weapons have their own strengths, and no single weapon dominates every situation. Choosing a weapon is choosing "which zone and which tactic you want to shine in."
| Weapon | Where It Shines | Core Strength | Weakness |
|---|---|---|---|
| Katana (blade weapons) | all-purpose, anywhere from Front Zone to Flank | Cheapest parry reservation Energy (1 Energy). Vertical growth with Finesse+Swordsmanship. | Not specialized. It is not 1st place anywhere. |
| Nodachi/Zanbato | single-target destruction, killing blow | +1 Wound on Critical Hit. Maximum damage against Defenseless targets. | Expensive Energy (3+). Cannot flurry. |
| Yari (spear weapons) | Domination +1 in the Front Zone | reach, powerful checking stance. Dedicated cavalry-spear techniques. | +1 Energy penalty in the Core Zone. |
| Naginata | wide cuts, Rear interdiction | 1 Energy checking blocks adjacent enemy movement. | Weak precise attacks. |
| Bow (bow weapons) | safe fire from the Rear Zone | Fires within the same zone, adjacent zones, or 2-3 zones depending on type. Synchronizes with squad volleys. No reload required. | Powerless in melee. |
| Teppo (gun weapons) | breaking Defense 14+ heavy armor | [Pierce all]. Matchlock + squad volley shatters shield walls. | Reload occupies the defense slot. Useless in rain. |
| Tanto/unarmed combat (short weapons) | Core Zone melees | Combo Fatigue -1 (Core only). Some techniques cost 1 Energy. | -1 penalty in the Front Zone. Weak in 1 to 1 fights. |
| Staff/vajra (staff weapons) | nonlethal suppression, yoma exorcism | Focuses on stunning and binding. The vajra gains +2 on Exorcism checks, specializing against yoma. | Few precise-attack options. |
#Weapon Selection Guide
- Do not try to cover every situation with one weapon. Every character has 1~2 zones where they shine.
- Squads and weapons are designed together. Yari + spearman squad, bow + archer squad, teppo + teppo squad — squads using the same weapon create synergy.
- Do not give everyone a tanto just because tanto are strong. Tanto have an edge only in the Core Zone. If a Front Zone samurai carries a tanto, the reason to bring a yari squad disappears.
#Blade Weapons (刀類) — katana line
#5 Standard Katana
#1. Tachi (太刀) — mounted blade
#Scent
A long blade a mounted warrior cuts down with from horseback. It can be used on foot, but it shines from the saddle. Its weight gives strong downward force, but it is awkward in tight spaces.
#Law
| Technique | Type | Energy | Check | Effect | Limit |
|---|---|---|---|---|---|
| Mounted Wild Cut (騎馬亂刀) | Attack A (Courage) | 2 | 2d10+Courage+Swordsmanship >= Defense | 1 Wound. +1 bonus while mounted. | — |
| Entry Cut (突入斬り) | Attack B (Finesse) | 3 | 2d10+Finesse+Swordsmanship >= Defense | 1 Wound. Combines movement+attack. Counts as a dash. | 1 time/breath |
| Back-Edge Block (峰受け) | Defense | reservation 1/improvised 2 | 2d10+Physique >= enemy attack | Negate the hit. On success, enemy -1 penalty (next attack). | — |
| [Licensed] Spinning Drop Cut (回轉落刀) | Attack | 3 | 2d10+Courage+Swordsmanship >= Defense | 2 Wounds. Leap down from horseback while cutting. Dismount. | 1 time/round |
- Zone Bonus: Mounted Wild Cut +1 in the Front Zone. Energy +1 in the Core Zone (counts as a long weapon).
- Recommended: mounted-build samurai. Front Zone charge specialist.
- Price: gold 6
#2. Uchigatana (打刀) — standard blade
#Scent
The most common katana. A curved blade suited to iaijutsu. It allows "draw cutting," where drawing from the scabbard is itself an attack. It is versatile but not exceptional — the wielder's skill determines the blade's worth.
#Law
| Technique | Type | Energy | Check | Effect | Limit |
|---|---|---|---|---|---|
| Horizontal Cut (橫斬り) | Attack A (Courage) | 2 | 2d10+Courage+Swordsmanship >= Defense | 1 Wound. Standard attack. | — |
| Thrust (突き) | Attack B (Finesse) | 2 | 2d10+Finesse+Swordsmanship >= Defense | [Pierce 2]. 1 Wound. | — |
| Parry (受け流し) | Defense | reservation 1/improvised 2 | 2d10+Finesse+Swordsmanship >= enemy attack | Negate the hit. | — |
| [Licensed] Single Flash (一閃) | Attack | 3 | 2d10+Courage+Swordsmanship >= Defense | 1 Wound. The next time hit, including if defense or evasion negates the damage, automatically counterattack+2d10+Courage+Swordsmanship. Attack and defense as one. | 1 time/round |
- Zone Bonus: none. Same everywhere.
- Recommended: general-purpose. The default for every build.
- Price: gold 5
#3. Kodachi (小太刀) — short blade
#Scent
A blade shorter than a katana. Suited to indoor fighting and dense melees. It is also used as the off-hand weapon for nito-ryu. It is especially easy to handle in the Core Zone and capable on defense.
#Law
| Technique | Type | Energy | Check | Effect | Limit |
|---|---|---|---|---|---|
| Continuous Cuts (連斬り) | Attack A (Courage) | 1 | 2d10+Courage+Swordsmanship >= Defense | [Light]. 1 Wound. Enables low-Energy flurries. | — |
| Guard Thrust (守突き) | Attack B (Finesse) | 2 | 2d10+Finesse+Swordsmanship >= Defense | 1 Wound. Can be used immediately after defending (defense+attack combined). | 1 time/breath |
| Cross Guard (十字受け) | Defense | reservation 1/improvised 2 | 2d10+Finesse+Swordsmanship >= enemy attack | Negate the hit. On success, +1 to the next attack (only when dual-wielding). | — |
| [Licensed] Nito Combined Strike (二刀合擊) | Attack | 3 | 2d10+Courage+Swordsmanship >= Defense | Katana+kodachi double attack. 2 Wounds. Only while equipped for nito-ryu. | 1 time/round |
- Zone Bonus: Energy -1 in the Core Zone (counts as a short weapon). No change in the Front Zone.
- Recommended: Core Zone combat, nito-ryu builds.
- Price: gold 3
#4. Zanbato (斬馬刀) — horse-cutter
Alias contract: zanbato and nodachi are the same weapon in rules terms. Either name uses the same cost, check, techniques, zone bonuses, and price. A masterwork or Divine Artifact adds only the unique technique explicitly stated by that entry.
#Scent
A great blade called either zanbato or nodachi, made to cut a mounted warrior together with the horse. Too heavy to wield in one hand, it can split a person through armor, but its weight prevents repeated strikes.
#Law
| Technique | Type | Energy | Check | Effect | Limit |
|---|---|---|---|---|---|
| Horse-Cut (斬馬) | Attack A (Courage) | 3 | 2d10+Courage+Swordsmanship >= Defense | 1 Wound + additional 1 Wound against mounted targets. | — |
| Rising Cut (切上げ) | Attack B (Physique) | 3 | 2d10+Physique+Swordsmanship >= Defense | 1 Wound + enemy Defenseless (next breath). | 1 time/breath |
| Blade-Body Block (刀身受け) | Defense | reservation 2/improvised 3 | 2d10+Physique >= enemy attack | Negate the hit. On a defense Critical Hit, seal the enemy weapon for 1 round. | — |
| [Licensed] Cut in Two (一刀兩斷) | Attack | 4 | 2d10+Courage+Swordsmanship+1 >= Defense | 2 Wounds. 3 Wounds on a Critical Hit. | 1 time/round |
- Zone Bonus: attack checks +1 in the Front Zone. Energy +1 in the Core Zone (counts as a long weapon).
- Recommended: anti-cavalry, large-target specialist.
- Price: gold 7
#5. Ninjato (忍者刀) — shinobi blade
#Scent
A shinobi's straight blade. Because it is straight rather than curved, it specializes in thrusting. The long scabbard can be used as a breathing tube while diving or as a foothold while climbing walls. It is closer to a tool than a battlefield weapon.
#Law
| Technique | Type | Energy | Check | Effect | Limit |
|---|---|---|---|---|---|
| Straight Stab (直刺) | Attack A (Finesse) | 2 | 2d10+Finesse+Swordsmanship >= Defense | [Pierce 1]. 1 Wound. | — |
| Reverse-Grip Cut (逆手斬り) | Attack B (Courage) | 1 | 2d10+Courage+Ninjutsu >= Defense | [Light]. 1 Wound. Can maintain infiltration. | — |
| Scabbard Block (鞘受け) | Defense | reservation 1/improvised 2 | 2d10+Finesse >= enemy attack | Defense +1 while reserved. On success, negate the hit. Even on failure, damage -1 Wound (minimum 1). | — |
| [Licensed] Surprise Strike (不意打ち) | Attack | 2 | 2d10+Finesse+Ninjutsu+3 >= Defense | 1 Wound. Only while infiltrating. Infiltration ends. +3 bonus. | 1 time/round |
- Zone Bonus: Reverse-Grip Cut +2 in the Flank Zone. Energy -1 in the Core Zone (short weapon). Combo Fatigue reduced -2→-1.
- Recommended: shinobi, infiltration builds.
- Price: gold 4
→ Masterworks: see Masterwork Compendium.
#Spear Weapons (槍類) — yari line
#5 Standard Yari
#1. Su-yari (素槍) — straight spear
#Scent
A plain straight spear. The ashigaru's basic weapon. Even without technique it can thrust, and in numbers it becomes a wall.
#Law
| Technique | Type | Energy | Check | Effect | Limit |
|---|---|---|---|---|---|
| Straight Thrust (直突き) | Attack A (Courage) | 2 | 2d10+Courage+Spearmanship >= Defense | 1 Wound. Range: same zone+adjacent Front Zone. | — |
| Sweep (薙ぎ) | Attack B (Physique) | 2 | 2d10+Physique+Spearmanship >= Defense | No damage. Force move the target (adjacent zone). | 1 time/breath |
| Check (牽制) | Defense | reservation 2/improvised 3 | automatic on enemy movement | Against an enemy entering the zone, 2d10+Courage+Spearmanship >= Defense. On hit, movement stops+1 Wound. | — |
| [Licensed] Spear Wall (槍壁) | Stance | 2 | — | While maintained, your zone Domination +3. +4 in the Front Zone. Cannot move. | maintain |
- Zone Bonus: Straight Thrust +1 in the Front Zone. Core Energy +1.
- Recommended: squad weapon. Front Zone defense.
- Price: gold 2
#2. Jumonji-yari (十文字槍) — cross spear
#Scent
A spear whose head splits into a cross. It can thrust and also hook and pull. It can take an enemy's weapon or drag a mounted warrior down from the horse.
#Law
| Technique | Type | Energy | Check | Effect | Limit |
|---|---|---|---|---|---|
| Cross Thrust (十文字突き) | Attack A (Courage) | 2 | 2d10+Courage+Spearmanship >= Defense | 1 Wound. Range: same+adjacent Front Zone. | — |
| Hook Pull (鎌引き) | Attack B (Finesse) | 2 | 2d10+Finesse+Spearmanship vs enemy 2d10+Physique | No damage. On success, disarm or unhorse. | 1 time/breath |
| Cross Block (十文字受け) | Defense | reservation 1/improvised 2 | 2d10+Courage+Spearmanship >= enemy attack | Negate the hit. On success, catch the enemy weapon (enemy's next attack Energy+1). | — |
| [Licensed] Wild Spears (亂槍) | Attack | 3 | 2d10+Courage+Spearmanship >= Defense | Simultaneously check 2 enemies in the same zone. Each takes 1 Wound. | 1 time/round |
- Zone Bonus: +1 in the Front Zone. Core Energy +1.
- Recommended: anti-cavalry, disarming specialist.
- Price: gold 5
#3. Kamayari (鎌槍) — sickle spear
#Scent
A variant spear with a sickle attached to the head. It can cut and thrust, so warrior monks favor it. It sits between naginata and yari.
#Law
| Technique | Type | Energy | Check | Effect | Limit |
|---|---|---|---|---|---|
| Thrust (突き) | Attack A (Courage) | 2 | 2d10+Courage+Spearmanship >= Defense | 1 Wound. Range: same+adjacent. | — |
| Sickle Cut (鎌斬り) | Attack B (Finesse) | 2 | 2d10+Finesse+Spearmanship >= Defense | 1 Wound + bleeding (1 Wound each Lull, Physique>=13 or Medicine>=11 ends). | 1 time/breath |
| Haft Block (柄受け) | Defense | reservation 1/improvised 2 | 2d10+Physique >= enemy attack | Negate the hit. | — |
| [Licensed] Warrior-Monk Dance (僧兵亂舞) | Attack | 3 | 2d10+Courage+Spearmanship >= Defense | 1 Wound + bleeding + checking (next breath, if the enemy tries to leave an adjacent zone, opposed Spearmanship. On enemy failure, cannot move). | 1 time/round |
- Zone Bonus: Front Zone +1. Core Energy +1.
- Recommended: warrior-monk builds. Bleeding specialist.
- Price: gold 4
#4. Teyari (手槍) — throwing spear
#Scent
A short spear. It can be thrown. It is an ashigaru sidearm and something a ronin hides for self-defense. A consumable weapon to use and lose, but deadly when thrown at close range.
#Law
| Technique | Type | Energy | Check | Effect | Limit |
|---|---|---|---|---|---|
| Thrust (突き) | Attack A (Courage) | 1 | 2d10+Courage+Spearmanship-1 >= Defense | [Light]. 1 Wound. Light (accuracy -1). | — |
| Throw (投擲) | Attack B (Finesse) | 2 | 2d10+Finesse+Spearmanship >= Defense | 1 Wound. Range: adjacent zone. Weapon lost after throwing. | consumed |
| Haft Guard (柄防ぎ) | Defense | reservation 1/improvised 2 | 2d10+Finesse >= enemy attack | Defense +1 while reserved. On a successful defense, damage -1 Wound (minimum 1). On a defense Critical Hit, negate the hit. | — |
| [Licensed] Rapid Throws (連投) | Attack | 3 | 2d10+Finesse+Spearmanship >= Defense | Throw at 2 bodies. Each takes 1 Wound. Consume 2 teyari. | consumed |
- Zone Bonus: no Energy change in the Core Zone (standard size).
- Recommended: sidearm. First-breath throw → switch to main weapon.
- Price: gold 1 (set of 3)
#5. Naginata (薙刀) — long blade spear
#Scent
A weapon with a blade mounted on a long shaft. It cuts like a katana while reaching like a yari. Onna-musha and warrior monks favor it. Elegant and lethal.
#Law
| Technique | Type | Energy | Check | Effect | Limit |
|---|---|---|---|---|---|
| Horizontal Sweep (橫掃) | Attack A (Courage) | 3 | 2d10+Courage+Spearmanship >= Defense | Check 2 enemies in the same zone. Each success deals 1 Wound. Wide (split across 2 bodies). | — |
| High Cut (上段斬り) | Attack B (Finesse) | 2 | 2d10+Finesse+Spearmanship >= Defense | 1 Wound. Range: same+adjacent. | — |
| Naginata Block (薙刀受け) | Defense | reservation 1/improvised 2 | 2d10+Finesse+Spearmanship >= enemy attack | Negate the hit. Can also defend against attacks from outside reach (adjacent zone). | — |
| [Licensed] Chain Sweep (連環掃) | Attack | 4 | 2d10+Courage+Spearmanship >= Defense | Check all enemies in the same zone. Each takes 1 Wound. | 1 time/round |
- Zone Bonus: Front Zone +1. Core Energy +1 (long weapon).
- Recommended: wide-attack specialist. Against many enemies.
- Price: gold 5
→ Masterworks: see Masterwork Compendium.
#Bow Weapons (弓類) — bow line
#3 Standard Bows
Bow-line reload rule. Bows reload automatically at no cost with every shot(fired straight from the quiver). Unlike teppo, reloading does not occupy the defense slot or movement — this is the core contrast axis with teppo.
#1. Hankyu (半弓) — short bow
| Technique | Type | Energy | Check | Effect | Limit |
|---|---|---|---|---|---|
| Quick Shot (速射) | Attack A (Finesse) | 1 | 2d10+Finesse+Archery >= Defense | [Light]. 1 Wound. Range: adjacent. | — |
| Arcing Shot (曲射) | Attack B (Wisdom) | 2 | 2d10+Wisdom+Archery >= Defense | 1 Wound. Ignore cover. Range: adjacent. | 1 time/breath |
| Evasive Shot (回避射擊) | Defense | reservation 1/improvised 2 | 2d10+Finesse >= enemy attack | Evade while falling back. On success, immediately counter with 1 shot. | — |
| [Licensed] Rapid Fire (連射) | Attack | 3 | 2d10+Finesse+Archery >= Defense | 3 consecutive shots. Each 1 Wound (3 bodies or same target). | 1 time/round |
Price: gold 3. Close-range rapid-fire specialist. For mounted archers.
#2. Daikyu (大弓) — longbow
| Technique | Type | Energy | Check | Effect | Limit |
|---|---|---|---|---|---|
| Direct Shot (直射) | Attack A (Courage) | 2 | 2d10+Courage+Archery >= Defense | 1 Wound. Range: 2 zones. | — |
| Arcing Shot (曲射) | Attack B (Wisdom) | 3 | 2d10+Wisdom+Archery >= Defense | 1 Wound. Ignore cover. Range: 3 zones. | 1 time/breath |
| Bow-Stave Block (弓幹受け) | Defense | reservation 2/improvised 3 | 2d10+Physique >= enemy attack | Defense +1 while reserved. On a successful defense, damage -1 Wound (minimum 1). On a defense Critical Hit, negate the hit. Emergency melee defense. | — |
| [Licensed] Piercing Shot (貫通射) | Attack | 3 | 2d10+Courage+Archery+1 >= Defense | [Pierce 2]. 2 Wounds. 1 Wound to the enemy behind as well. Aim Focus [Pierce] allowed (§Aim Focus). | 1 time/round |
Price: gold 5. Long-range sniping. Rear specialist.
#3. Yumiya (弓矢) — squad bow
Yumiya techniques are used through a Squad Command, and the commander pays the cost. Base and +N below mean the Squad Command's base and added cost; the commander's Wisdom discount applies normally. Do not create separate Energy, ammunition, or reaction resources for the squad itself.
| Technique | Type | Added Command Cost | Check | Effect | Limit |
|---|---|---|---|---|---|
| Volley (一齊射擊) | Attack A (—) | Base | 2d10 >= Defense | Choose a zone. 1~3 Minions killed or wounded (apply hit-strength table). Range: adjacent. | — |
| Suppressive Fire (制壓射擊) | Attack B (Wisdom) | +1 | — (automatic) | Target zone movement +2 Energy (1 round). No damage. | 1/round |
| Spread Out (散開) | Defense | reserve Base/improvised +1 | — | The squad spreads out. Damage -1 Wound against enemy area techniques. For a reservation, pay the command cost on your breath; it remains until your next breath or until triggered once. An improvised use applies to the triggering attack. | — |
| [Licensed] Fire Arrows (火矢) | Attack | +1 | 2d10 >= 11 | Give the target zone the Fire environmental gimmick. 1 additional Minion killed or wounded. The commanding character must have Archery at Licensed or higher. | 1/round |
Price: gold 2. Squad-only weapon. Assigned to Minion archer squads.
→ Masterworks: see Masterwork Compendium.
#Gun Weapons (銃類) — teppo line
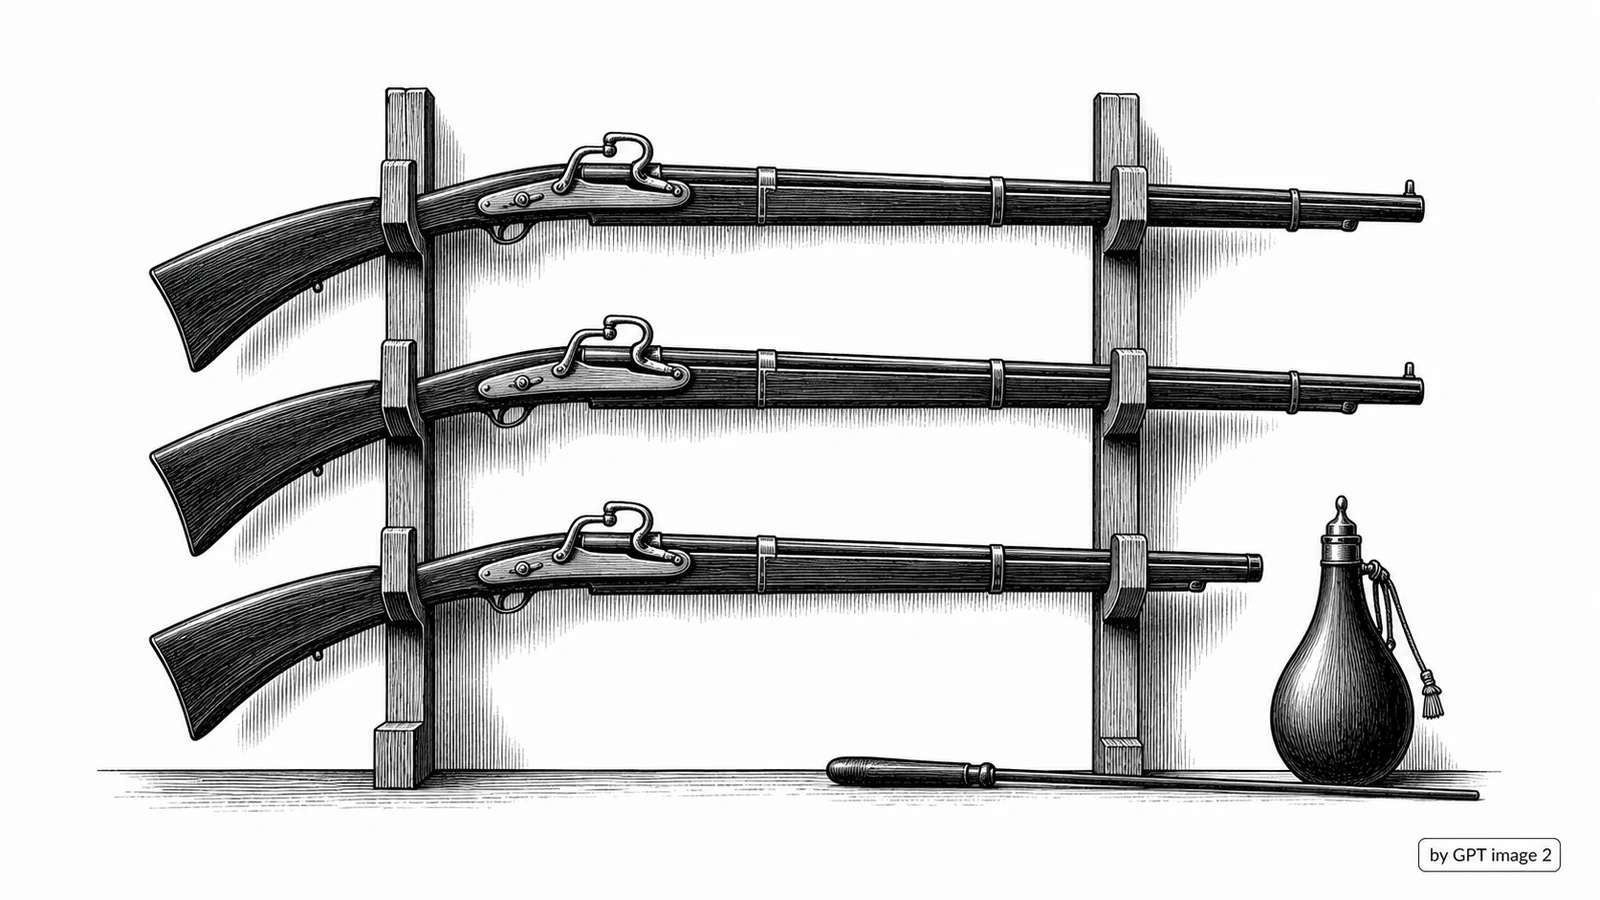
#5 Standard Teppo
Teppo check rule (Defense-based). A teppo's individual single-target fire(Direct Fire, Rapid Fire, Fire, Twin Shot, Three-Rank Fire) is rolled as
2d10 + Archery >= Defense(no ability score added) +[Pierce all]. Because[Pierce all]neutralizes armor and shields, it punches through heavy armor(Defense 16 → effective 10), but non-armor Defense such as evasion, stance, Barrier, and cover still applies to the hit(that area is[Direct], which a teppo cannot pierce). Critical Hit = 2 Wounds + 1 Wound to the enemy behind. Zone-designated area fire from cannons and mortars(ozutsu bombardment/chain bombardment, mortar concentrated fire) is a scatter check rather than an individual Defense comparison, so it keeps the fixed target number2d10+Archery >= 11. The reload that occupies a defense slot with every shot is the price of this strong armor bypass.
#1. Tanegashima (種子島) — standard matchlock
#Law
| Technique | Type | Energy | Check | Effect | Limit |
|---|---|---|---|---|---|
| Direct Fire (直射) | Attack A (—) | 2 | 2d10+Archery >= Defense | [Pierce all]. 1 Wound. Range: adjacent zone. | — |
| Arcing Fire (曲射) | Attack B (Wisdom) | 3 | 2d10+Wisdom+Archery >= Defense | 1 Wound. Ignore cover. Range: 2 zones. | 1 time/breath |
| Reload (再裝填) | Defense | 2 | — | Enables next shot. Required after firing. Cannot move while reloading. | — |
| [Licensed] Three-Rank Fire (三段射擊) | Attack | 4 | 2d10+Archery >= Defense | [Pierce all]. 2 Wounds. 3 consecutive shots (preloaded). Must prepare before battle starts. | 1 time/battle |
Price: gold 8
#2. Nicchoho (二挺砲) — twin pistols
#Scent
2 small firearms brought from Nanban. If fired one at a time, they allow 2-shot rapid fire without reloading. Their range is short, but they can be used indoors and in the Core Zone.
#Law
| Technique | Type | Energy | Check | Effect | Limit |
|---|---|---|---|---|---|
| Rapid Fire (連射) | Attack A (—) | 2 | 2d10+Archery >= Defense | [Pierce all]. 1 Wound. Range: same zone (short range). Consumes 1 loaded shot. | — |
| Twin Shot (雙發) | Attack B (—) | 3 | 2d10+Archery >= Defense | [Pierce all]. 1 Wound each to 2 targets. Simultaneous fire. Requires both loaded shots and consumes both. | 1 time/breath |
| Reload (再裝填) | Defense | 3 | — | Only when loaded shots are 0, reload both pistols together and restore the bundle to 2 loaded shots. | — |
| [Licensed] Lightning Barrage (雷速亂射) | Attack | 4 | 2d10+Archery >= Defense | [Pierce all]. 1 Wound each to 3 enemies in the same zone. Requires both loaded shots and consumes both. | 1 time/battle |
Loaded-shot contract: Track the two Nicchoho pistols as one bundle with 2 loaded shots. Rapid Fire consumes one shot at a time; after the second shot, no firing is possible until reloading. Twin Shot and Lightning Barrage can be used only while both shots remain. Reloading restores both pistols together; partial reloads and separate per-pistol tracking are not allowed.
- Zone Bonus: usable in the Core Zone! (Normal teppo cannot.) Same zone only.
- Recommended: gaijin entering the Core Zone. Short-range specialist.
- Price: gold 10
#3. Ozutsu (大筒) — cannon
#Scent
A huge cannon. It cannot be carried alone. A squad transports it, installs it in a position, and fires. When it hits, the zone shakes.
#Law
| Technique | Type | Energy | Check | Effect | Limit |
|---|---|---|---|---|---|
| Bombardment (砲擊) | Attack A (—) | 5 | 2d10+Archery >= 11 | Everyone in target zone takes 2 Wounds (friend or foe — choose a zone). Mobs/Minions die instantly. | 2 times/battle |
| Intimidating Fire (威嚇射擊) | Attack B (Presence) | 3 | — (automatic) | No damage. Enemy squads in target zone take Cohesion -2. The sound alone breaks morale. | 1 time/round |
| Reload (再裝填) | Defense | 4 | — | Reload. Requires 2 squad members. Alone, Energy 6. | — |
| [Licensed] Chain Bombardment (連鎖砲擊) | Attack | 5 | 2d10+Archery >= 11 | 1 Wound each to 2 adjacent zones (area). Mobs wiped out. | 1 time/battle |
- Restriction: requires 1 round to install. Cannot move (position weapon). Squad transport required.
- Recommended: sieges, large-scale battle.
- Price: gold 20
#4. Bayonet (銃剣) — bayonet
#Scent
A Nanban-style gun fitted with a blade. If enemies approach while you are shooting, you stab with the blade. A hybrid weapon that can switch to melee instead of reloading.
#Law
| Technique | Type | Energy | Check | Effect | Limit |
|---|---|---|---|---|---|
| Fire (射擊) | Attack A (—) | 2 | 2d10+Archery >= Defense | [Pierce all]. 1 Wound. Adjacent zone. | — |
| Bayonet Charge (銃劍突撃) | Attack B (Courage) | 2 | 2d10+Courage+Spearmanship >= Defense | 1 Wound. Same-zone melee. Switch without reloading. | — |
| Reload (再裝填) | Defense | 2 | — | Restore ability to fire. | — |
| [Licensed] Bayonet Breakthrough (銃劍突破) | Attack | 3 | 2d10+Courage+Spearmanship >= Defense | Combines movement+Bayonet Charge. 1 Wound+Breakthrough check exempt. | 1 time/round |
- Zone Bonus: adapts to zone changes by switching between ranged+melee.
- Recommended: all-purpose gaijin moving between Front Zone↔Rear.
- Price: gold 9
#5. Mortar (迫擊砲) — small mortar
#Scent
A portable small cannon. It fires in an arc and can hit behind cover. Its accuracy is low, but the psychological pressure is high.
#Law
| Technique | Type | Energy | Check | Effect | Limit |
|---|---|---|---|---|---|
| Arcing Bombardment (曲射砲擊) | Attack A (Wisdom) | 3 | 2d10+Wisdom+Archery >= Defense | 1 Wound. Ignore cover. Range: 2 zones. | — |
| Smoke Shell (煙幕彈) | Attack B (—) | 2 | — (automatic) | Target zone cannot make ranged attacks (1 round). Covers allied movement. | 1 time/round |
| Reload (再裝填) | Defense | 2 | — | Reload. | — |
| [Licensed] Concentrated Fire (集中砲火) | Attack | 4 | 2d10+Archery >= 11 | Everyone in target zone takes 1 Wound + cannot move (1 breath). Debris scatters. | 1 time/battle |
- Recommended: Rear support. Ignoring cover is the core.
- Price: gold 12
→ Masterworks: see Masterwork Compendium.
#Short Weapons (短兵類) — tanto/unarmed line
#Short Weapon Common Rule — Core Bonus (重要)
Short weapons are short and light, so they shine in cramped spaces. When entering the Core Zone:
- The Energy -1 bonus is stopped by the minimum 1 Energy floor (weapons already at 1 Energy do not decrease further)
- Instead, the Combo Fatigue penalty decreases from -2 → -1
- On the same target in the same round, the 4th hit is -1, the 5th hit is -2, and the 6th hit is -3 (normal weapons are -2/-4/-6)
- In other words, short weapons in the Core Zone are not faster, but less tiring
Applies to: tanto, kaiken, makiri, kunai (in melee), fists (unarmed/Unarmed Combat), kodachi (classified as a blade weapon but treated as a short weapon), ninjato (straight blade, treated as a short weapon)
→ Details: Energy and Breath §Short Weapon Core Bonus, Wounds and Defeat §Combo Fatigue
#5 Standard Tanto
#1. Tanto (短刀) — standard dagger
| Technique | Type | Energy | Check | Effect | Limit |
|---|---|---|---|---|---|
| Thrust (突き) | Attack A (Courage) | 1 | 2d10+Courage+Swordsmanship >= Defense | [Light]. 1 Wound. | — |
| Inside the Guard (懷入り) | Attack B (Finesse) | 1 | 2d10+Finesse+Swordsmanship >= Defense | [Light]. 1 Wound. [Pierce 3] in the Core Zone. [Pierce 1] outside the Core Zone. | — |
| Emergency Evasion (緊急回避) | Defense | reservation 1/improvised 2 | 2d10+Finesse >= enemy attack | Negate the hit. Even on failure, damage -1 Wound (minimum 1). Treat the opponent's Critical Hit as an ordinary success. | — |
| [Licensed] Pierce the Vital Point (急所貫き) | Attack | 2 | 2d10+Finesse+Ninjutsu >= Defense | [Pierce 2]. 2 Wounds. Bleeding on a Critical Hit. Aim Focus [Pierce] allowed (§Aim Focus). | 1 time/round |
Price: gold 1. Zone: applies Combo Fatigue -1 in the Core Zone (the -2 penalty is eased to -1). All-purpose sidearm.
#2. Kaiken (懷劍) — hidden dagger
| Technique | Type | Energy | Check | Effect | Limit |
|---|---|---|---|---|---|
| Stealth Thrust (隱密突き) | Attack A (Finesse) | 1 | 2d10+Finesse+Ninjutsu >= Defense | [Light]. 1 Wound. Maintain infiltration. | — |
| Self-Execution (自決) | Attack B (Courage) | 1 | automatic | 2 Wounds to yourself. Optional use. | — |
| Hidden-Blade Guard (飛手受け) | Defense | reservation 1/improvised 2 | 2d10+Finesse >= enemy attack | Negate the hit. Even on failure, +1 to the next attack (counter posture). | — |
| [Licensed] Assassination (暗殺) | Attack | 2 | 2d10+Finesse+Ninjutsu+3 >= Defense | [Pierce 3]. 3 Wounds. Only while infiltrating. Infiltration ends. | 1 time/battle |
Price: gold 2. Special: Perception-3 (easy to hide). Shinobi/Entertainer only.
#3. Makiri — Emishi small blade
| Technique | Type | Energy | Check | Effect | Limit |
|---|---|---|---|---|---|
| Hunting Cut (狩獵斬り) | Attack A (Courage) | 1 | 2d10+Courage+Survival >= Defense | [Light]. 1 Wound. Add bleeding only if the user has the Wildlander's 3rd-dan Makiri aptitude. | — |
| Skinning Cut (皮剝ぎ) | Attack B (Finesse) | 1 | 2d10+Finesse+Survival >= Defense | [Light]. [Pierce 2]. 1 Wound. [Break] on a Critical Hit. "Strip the armor." | 1 time/breath |
| Wild Instinct (野生の勘) | Defense | reservation 1/improvised 2 | 2d10+Physique >= enemy attack | Negate the hit. Physique check (different from other daggers). | — |
| [Licensed] Iyomante Cut (Iyomante-giri) | Attack | 2 | 2d10+Courage+Survival+2 >= Defense | 2 Wounds. +1 Wound against yoma. Blessing of kamuy. | 1 time/round |
Price: gold 2. Recommended for Wildlander only.
#4. Kunai (苦無) — throwing dagger
| Technique | Type | Energy | Check | Effect | Limit |
|---|---|---|---|---|---|
| Throw (投擲) | Attack A (Finesse) | 1 | 2d10+Finesse+Ninjutsu >= Defense | [Light]. 1 Wound. Range: adjacent zone. Consumed (lost after throw). | consumed |
| Close Thrust (近接突き) | Attack B (Courage) | 1 | 2d10+Courage+Ninjutsu-1 >= Defense | [Light]. 1 Wound. Same zone (accuracy -1). | — |
| Kunai Guard (苦無受け) | Defense | reservation 1/improvised 2 | 2d10+Finesse >= enemy attack | Defense +1 while reserved. On a successful defense, damage -1 Wound (minimum 1). On a defense Critical Hit, negate the hit. | — |
| [Licensed] Rapid Throws (連投) | Attack | 2 | 2d10+Finesse+Ninjutsu >= Defense | Simultaneous throw at 2 bodies. Each takes 1 Wound. Consume 2. | consumed |
Price: gold 0.5 (set of 5). Sidearm/initiative throw use.
#5. Fists (素手) — unarmed combat
| Technique | Type | Energy | Check | Effect | Limit |
|---|---|---|---|---|---|
| Strike (打擊) | Attack A (Courage) | 1 | 2d10+Courage+Unarmed Combat >= Defense | [Light]. 1 Wound. (Wildlander = treated as ordinary) | — |
| Grapple (組み) | Attack B (Physique) | 2 | 2d10+Physique+Unarmed Combat vs enemy 2d10+Physique | No damage. Bind (cannot move for 1 round). | 1 time/breath |
| Push Out (押し出し) | Defense | reservation 2/improvised 3 | 2d10+Physique+Unarmed Combat vs enemy 2d10+Physique | Force-move enemy (adjacent zone). No damage. | — |
| [Licensed] Chain Technique (連鎖技) | Attack | 2 | 2d10+Courage+Unarmed Combat >= Defense | 1 Wound+bind. Strike and grapple at once. | 1 time/round |
Price: none (bare hands). Unarmed Combat grapple/push checks +2 in the Core Zone. Core tool for Wildlander/Esoteric Monk.
→ Masterworks: see Masterwork Compendium.
#Staff Weapons (棒類) — staff/vajra line
#3 Staffs
#1. Rokushakubo (六尺棒) — long staff
| Technique | Type | Energy | Check | Effect | Limit |
|---|---|---|---|---|---|
| Strike (打擊) | Attack A (Physique) | 2 | 2d10+Physique+Unarmed Combat >= Defense | 1 Wound. General-purpose regardless of armament. | — |
| Sweep (掃き) | Attack B (Finesse) | 2 | 2d10+Finesse+Unarmed Combat >= Defense | Check 2 bodies in the same zone. No damage to each. Knockdown (Defenseless 1 breath). | 1 time/breath |
| Staff Block (棒受け) | Defense | reservation 1/improvised 2 | 2d10+Physique >= enemy attack | Negate the hit. On success, force enemy to retreat (1 zone). | — |
| [Licensed] Whirlwind (旋風) | Attack | 3 | 2d10+Physique+Unarmed Combat >= Defense | 1 Wound to all enemies in the same zone. | 1 time/round |
- Zone Bonus: long weapon. Core Energy +1.
- Price: gold 1. Recommended for monks/Wildlanders. Specialized in suppression/knockdown rather than killing power.
#2. Vajra (金剛杵) — exorcist ritual implement
| Technique | Type | Energy | Check | Effect | Limit |
|---|---|---|---|---|---|
| Sacred Strike (聖打) | Attack A (Courage) | 2 | 2d10+Courage+Exorcism >= Defense | 1 Wound. 2 Wounds against yoma. | — |
| Mudra Strike (印法打) | Attack B (Wisdom) | 2 | 2d10+Wisdom+Exorcism >= Defense | 1 Wound + sealing effect (target cannot use 1 technique next breath). | 1 time/breath |
| Vajra Defense (金剛防) | Defense | reservation 1/improvised 2 | 2d10+Physique+Exorcism >= enemy attack | Negate the hit. +2 against yoma attacks. | — |
| [Licensed] Demon-Breaking Array (破魔陣) | Stance | 2 | — | While maintained, yoma Defense -2 in your zone. Allied attacks against yoma +1. | maintain |
- Zone Bonus: standard. Core Energy ±0.
- Price: gold 4. Recommended for Esoteric Monk only. Optimized for yoma fights.
#3. Tetsubo (鐵棒) — iron staff
| Technique | Type | Energy | Check | Effect | Limit |
|---|---|---|---|---|---|
| Crush (粉碎) | Attack A (Courage) | 3 | 2d10+Courage+Unarmed Combat >= Defense | [Pierce 1] + [Break]. 1 Wound. "Break the armor." | — |
| Rushing Strike (突進打) | Attack B (Physique) | 3 | 2d10+Physique+Unarmed Combat >= Defense | Combines movement+attack. 1 Wound + force-move target. | 1 time/breath |
| Iron Staff Guard (鐵棒受) | Defense | reservation 2/improvised 3 | 2d10+Physique >= enemy attack | Negate the hit. On a defense Critical Hit, seal the enemy weapon for 1 round. | — |
| [Licensed] Armor Break (甲冑破壞) | Attack | 4 | 2d10+Courage+Unarmed Combat+1 >= Defense | [Pierce 3] + [Break]. 2 Wounds. | 1 time/round |
- Zone Bonus: long weapon. Core Energy +1.
- Price: gold 5. Recommended for Wildlander/Esoteric Monk. Specialized in Defense breaking.
Look at a weapon and you can see its tactics. Which blade will you take?